banner


How To Change Low Beam Headlight On 2011 Chevy Malibu

2008-2012 Chevrolet Malibu Headlight Bulbs Replacement Guide
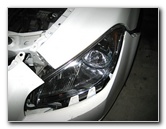
How to supplant the depression / loftier beam, turn betoken &  side marker bulbs in the headlight of a 2008 to 2012 GM Chevy Malibu.

Replacing the headlight bulbs in a 7th generation (2008-2012) Chevy Malibu does require at least partially removing the forepart bumper in order to unbolt the headlight assembly and access the bulbs. I've replaced headlight bulbs on many vehicles and the 08-12 Malibu is by far the most time consuming one. But it's non a hard procedure if you follow the steps below. 2008-2012-Chevy-Malibu-Headlight-Bulbs-Replacement-Guide-001
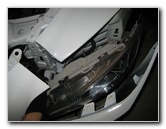
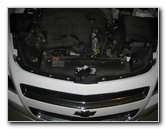
08-12 Malibu Headlight
2008-2012-Chevy-Malibu-Headlight-Bulbs-Replacement-Guide-002
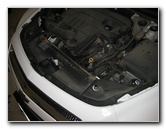
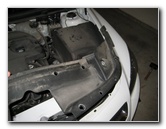
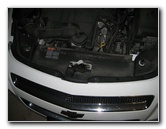
Black Plastic Radiator Cover
2008-2012-Chevy-Malibu-Headlight-Bulbs-Replacement-Guide-003
Remove 10mm Bolts
This automotive maintenance "how-to" guide was specifically written to assist owners of the 7th generation (2008, 2009, 2010, 2011 & 2012) General Motors Chevrolet Malibu in replacing a burnt out low beam, high axle, plough indicate or front side marker seedling in the headlight assembly.

Owners of other related GM vehicles such every bit the Buick Regal, Buick LaCrosse, Saab ix-5, 9-three, Opel Insignia, Saturn Aureola, Cadillac BLS, Fiat Croma, Opel Vectra, Signum and Pontiac G6 may also find these DIY instructions to be helpful.

Replacement headlight bulbs for the 08-12 Malibu include the following with their office numbers: Low Beam # H11, High Beam H9, Front Plough Indicate 4157NA, and Front Side Marker 168.

The tools needed to complete this procedure include a 7mm socket, a 10 mm socket, a ratcheting wrench, a flat head screwdriver and a pair of needle nose pliers.


2008-2012-Chevy-Malibu-Headlight-Bulbs-Replacement-Guide-004
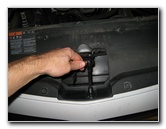
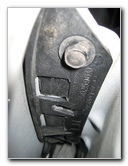
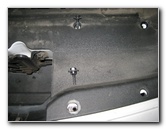
10mm Bolt By Hood Latch
2008-2012-Chevy-Malibu-Headlight-Bulbs-Replacement-Guide-005
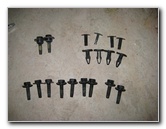
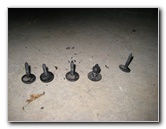
Dissimilar Bolts At Center
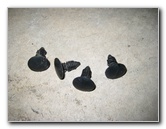
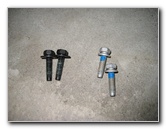
2008-2012-Chevy-Malibu-Headlight-Bulbs-Replacement-Guide-006
Two Types of Bolts
The get-go step is to remove the eleven 10mm bolts and four black plastic pop rivets that hold the radiator cover in place.

9 of the bolts are the exactly the same merely in that location are 2 10mm bolts with larger heads on either side of the hood latch mechanism near the front of the vehicle.

2008-2012-Chevy-Malibu-Headlight-Bulbs-Replacement-Guide-007
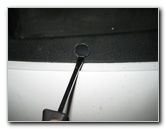
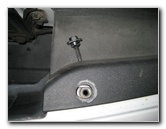
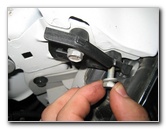
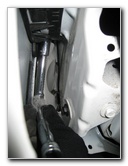
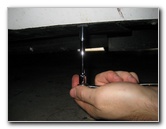
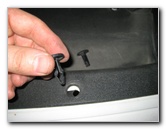
Pry Out Middle of Rivet
2008-2012-Chevy-Malibu-Headlight-Bulbs-Replacement-Guide-008
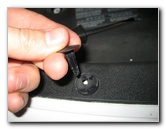
Pull Out Center of Pop Rivet
2008-2012-Chevy-Malibu-Headlight-Bulbs-Replacement-Guide-009
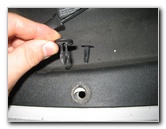
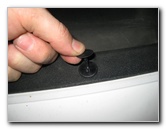
Pull Out Plastic Fastener
To remove the four black plastic pop rivets near the front edge of the radiator embrace, pry out the center piece first with a flathead screwdriver and then pry out the outer piece from the cover. 2008-2012-Chevy-Malibu-Headlight-Bulbs-Replacement-Guide-010
11 Bolts & iv Plastic Fasteners
2008-2012-Chevy-Malibu-Headlight-Bulbs-Replacement-Guide-011
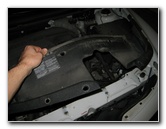
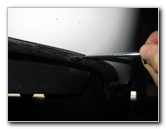
Remove Radiator Cover
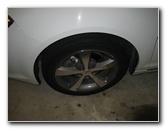
2008-2012-Chevy-Malibu-Headlight-Bulbs-Replacement-Guide-012
Front Bike
In one case y'all are done removing all of the bolts and pop rivets, set them bated in a prophylactic identify such equally a small parts case or in a Tupperware container. You should have two large head 10mm bolts, 9 regular head 10mm bolts, and four blackness plastic pop rivets with their center pieces.

Carefully lift off the radiator encompass and set it bated in a condom place.

2008-2012-Chevy-Malibu-Headlight-Bulbs-Replacement-Guide-013
Turn Wheels To Left
2008-2012-Chevy-Malibu-Headlight-Bulbs-Replacement-Guide-014
Remove 7mm Screws
2008-2012-Chevy-Malibu-Headlight-Bulbs-Replacement-Guide-015 To brand more room to work in the cycle well liner expanse, turn the steering bike all the manner to the opposite side of your burnt out headlight bulb.

Some people may choose to remove the cycle entirely for easier access to the wheel well liner.

If you program on replacing both headlight bulbs at the same time, it may exist easier to just remove both front end wheels and secure the vehicle with 2 jack stands.

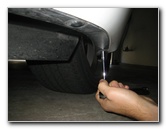
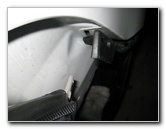
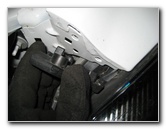
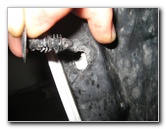
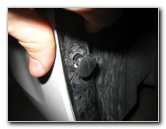
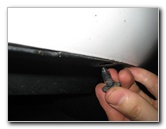
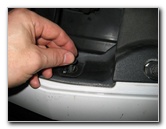
Movement to the front of the vehicle and lay downwardly beneath the front bumper. Locate the black 7mm screws along the black plastic underbody cover and remove them with a socket or wrench.

In that location is also one black plastic rivet that needs to be removed per side of the underbody comprehend.

If you are only replacing bulbs in one headlight assembly, y'all'll only need to remove 4-6 7mm screws and 1 pop rivet.

2008-2012-Chevy-Malibu-Headlight-Bulbs-Replacement-Guide-016
Pry Out Xmas Tree Fastener
2008-2012-Chevy-Malibu-Headlight-Bulbs-Replacement-Guide-017
Four 7mm Screws & 1 Rivet
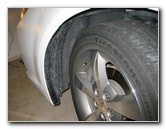
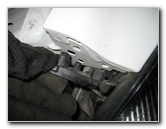
2008-2012-Chevy-Malibu-Headlight-Bulbs-Replacement-Guide-018
Wheel Well Liner
Next move to the wheel well liner and locate the black plastic pop rivets or "Christmas Tree" fasteners that hold it in place. 2008-2012-Chevy-Malibu-Headlight-Bulbs-Replacement-Guide-019
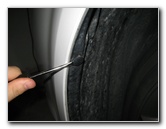
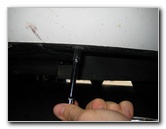
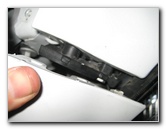
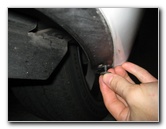
Pry Out Christmas Tree Rivets
2008-2012-Chevy-Malibu-Headlight-Bulbs-Replacement-Guide-020 2008-2012-Chevy-Malibu-Headlight-Bulbs-Replacement-Guide-021
Pull With Needle Nose Pliers
In that location are three plastic rivets forth the edge of the wheel well liner and 1 a few inches in towards the engine bay. 2008-2012-Chevy-Malibu-Headlight-Bulbs-Replacement-Guide-022
4 Bike Well Clips Removed
2008-2012-Chevy-Malibu-Headlight-Bulbs-Replacement-Guide-023
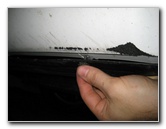
Pull Back Bicycle Well Liner
2008-2012-Chevy-Malibu-Headlight-Bulbs-Replacement-Guide-024
Organize Bolts & Screws
Once all four cycle well fasteners have been removed, you can peel back the liner in order to admission the last two 10mm bolts that hold the bumper cover in place.

Exist certain to keep all of the bolts, screws and rivets organized for easy re-associates subsequently.

2008-2012-Chevy-Malibu-Headlight-Bulbs-Replacement-Guide-025
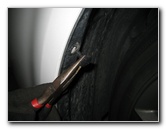
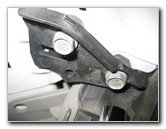
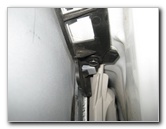
Front Bumper Cover Bracket
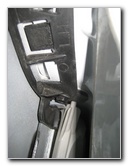
2008-2012-Chevy-Malibu-Headlight-Bulbs-Replacement-Guide-026
Two 10mm Bolts
2008-2012-Chevy-Malibu-Headlight-Bulbs-Replacement-Guide-027
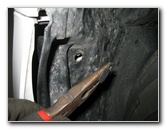
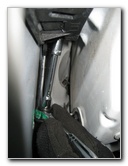
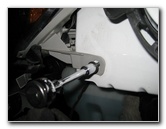
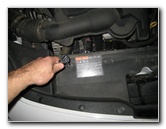
Remove 1st 10mm Bolt
In that location is ane 10mm bolt closer to the wheel well and some other a few inches in towards the front of the vehicle.

The closest 10mm bolt needs to be removed entirely. The 2nd inner commodities just needs to be loosened a bit.
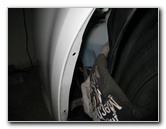
2008-2012-Chevy-Malibu-Headlight-Bulbs-Replacement-Guide-028
Outer Bolt Removed
2008-2012-Chevy-Malibu-Headlight-Bulbs-Replacement-Guide-029
Liner Propped Open up
2008-2012-Chevy-Malibu-Headlight-Bulbs-Replacement-Guide-030
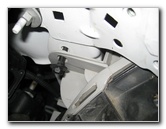
Loosen Inner 10mm Commodities
To make it easier to remove the first bolt and loosen the inner bolt, prop open up the wheel well liner with some rags, a safe mallet or some other soft item that won't impairment the trunk work. 2008-2012-Chevy-Malibu-Headlight-Bulbs-Replacement-Guide-031
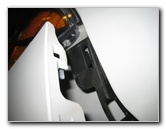
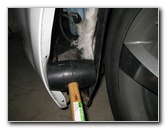
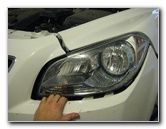
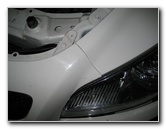
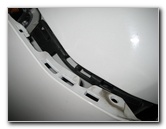
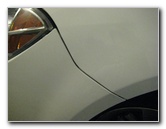
Pull Off Side of Bumper
2008-2012-Chevy-Malibu-Headlight-Bulbs-Replacement-Guide-032
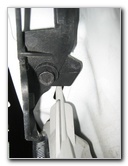
Inner 10mm Commodities Even so In Identify
2008-2012-Chevy-Malibu-Headlight-Bulbs-Replacement-Guide-033
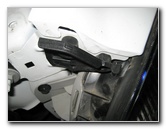
Pulling Off Bumper Cover
Once the bolt closest to the wheel well has been removed and the inner bolt has been loosened a few turns, you tin gently pull the bumper embrace away from the side of the vehicle.

If the side of the bumper doesn't pull abroad with moderate force, you may need to loosen the inner 10mm bolt a few more turns. Try to avoid removing it entirely, since it may exist difficult to re-insert.

2008-2012-Chevy-Malibu-Headlight-Bulbs-Replacement-Guide-034
Pull Off Top of Bumper
2008-2012-Chevy-Malibu-Headlight-Bulbs-Replacement-Guide-035
Headlight Bolts Accessible
2008-2012-Chevy-Malibu-Headlight-Bulbs-Replacement-Guide-036
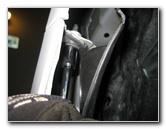
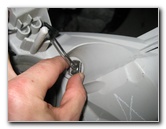
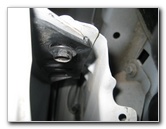
Side 10mm Commodities
Move to the front of the car and gently pull the bumper cover away from the headlight assembly. 2008-2012-Chevy-Malibu-Headlight-Bulbs-Replacement-Guide-037
10mm Socket - Remove Bolt
2008-2012-Chevy-Malibu-Headlight-Bulbs-Replacement-Guide-038
Remove Front Lower Bolt
2008-2012-Chevy-Malibu-Headlight-Bulbs-Replacement-Guide-039
2 Silver Bolts - Bracket
The headlight associates is held in place by iv 10 mm bolts.

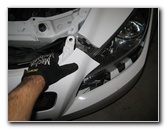
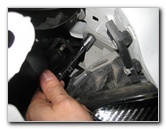
At that place is one black commodities on the side of the vehicle, ane black commodities at the front of the headlight, and two argent bolts that agree a black plastic subclass in place simply in a higher place the headlight lens.

2008-2012-Chevy-Malibu-Headlight-Bulbs-Replacement-Guide-040
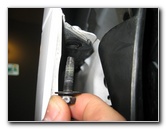
2 Blackness Bolts, 2 Silvery
2008-2012-Chevy-Malibu-Headlight-Bulbs-Replacement-Guide-041
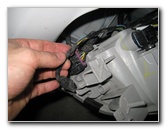
Pull Off Black Plastic Bracket
2008-2012-Chevy-Malibu-Headlight-Bulbs-Replacement-Guide-042
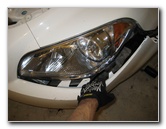
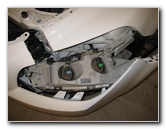
Pull Headlight Housing Off
Prepare the four 10mm headlight bolts bated in a safety identify, preferably with a Post-It note to aid you lot remember where they go during re-assembly.

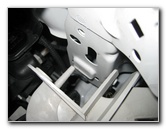
Pull off the black plastic subclass above the headlight.

At present the headlight assembly tin can finally be pulled away from the front of the vehicle.

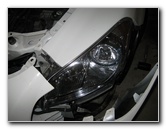
Turn the headlight assembly upside down and gently remainder it on the bumper. To assist avoid scratching the plastic headlight lens or the painted surfaces of the vehicle, identify a rag in betwixt the headlight and the bumper.

2008-2012-Chevy-Malibu-Headlight-Bulbs-Replacement-Guide-043
Turn Headlight Upside Down
2008-2012-Chevy-Malibu-Headlight-Bulbs-Replacement-Guide-044
High Beam Bulb
2008-2012-Chevy-Malibu-Headlight-Bulbs-Replacement-Guide-045
i/4 Plow Counter Clockwise
The Loftier Beam bulb is located near the center line of the vehicle and has a light blueish plastic label.

Grasp the base of the seedling with your thumb and forefinger. Rotate the base one/4 turn counter clockwise to unlock it from the assembly. Pull the bulb straight out of the headlight housing.

2008-2012-Chevy-Malibu-Headlight-Bulbs-Replacement-Guide-046
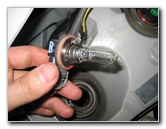
Pull Out High Axle Bulb
2008-2012-Chevy-Malibu-Headlight-Bulbs-Replacement-Guide-047
Pry Off Power Connector
2008-2012-Chevy-Malibu-Headlight-Bulbs-Replacement-Guide-048
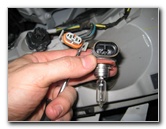
Power Connector & Bulb
Apply a small flathead screwdriver to gently pry off the high axle bulb'south power connector. 2008-2012-Chevy-Malibu-Headlight-Bulbs-Replacement-Guide-049
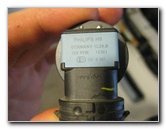
Philips H9 Bulb 12V 65W
2008-2012-Chevy-Malibu-Headlight-Bulbs-Replacement-Guide-050
Insert New H9 Bulb
2008-2012-Chevy-Malibu-Headlight-Bulbs-Replacement-Guide-051
i/4 Plough Clockwise To Lock
Avert touching the glass function of the new halogen seedling. If you do bear on the bulb or information technology gets muddied, wipe it clean with a paper towel moistened with rubbing booze earlier installing information technology.

Insert a new H9 high beam seedling straight into the headlight housing and rotate the base i/4 turn clockwise to secure it in place.

2008-2012-Chevy-Malibu-Headlight-Bulbs-Replacement-Guide-052
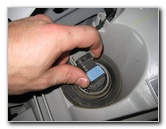
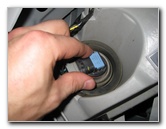
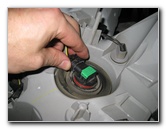
Low Beam Calorie-free Bulb
2008-2012-Chevy-Malibu-Headlight-Bulbs-Replacement-Guide-053
1/4 Turn Counter Clockwise
2008-2012-Chevy-Malibu-Headlight-Bulbs-Replacement-Guide-054
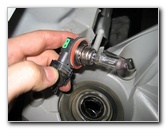
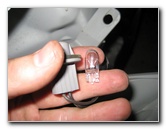
Pull Out Erstwhile Low Beam
The Low Beam headlight bulb is located closer to the outside edge of the vehicle and has a bright green plastic label.

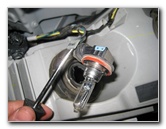
Rotate the base of the bulb 1/4 plough counter clockwise earlier pulling information technology straight out of the headlight housing.
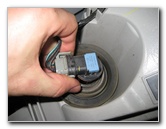
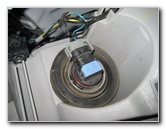
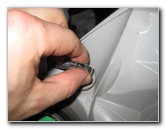
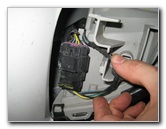
2008-2012-Chevy-Malibu-Headlight-Bulbs-Replacement-Guide-055
Pry Off Power Plug
2008-2012-Chevy-Malibu-Headlight-Bulbs-Replacement-Guide-056
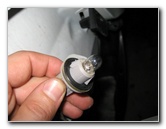
Power Plug & Depression Beam
2008-2012-Chevy-Malibu-Headlight-Bulbs-Replacement-Guide-057
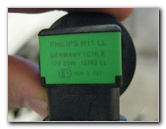
Philips H11 LL 12V 55W
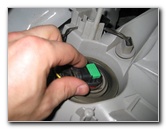
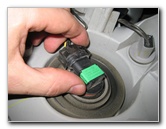
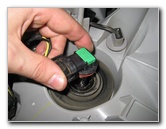
Use a pocket-size flathead screwdriver to gently pry off the low beam'due south power connector clips and split the bulb. 2008-2012-Chevy-Malibu-Headlight-Bulbs-Replacement-Guide-058
Insert New H11 Bulb
2008-2012-Chevy-Malibu-Headlight-Bulbs-Replacement-Guide-059
1/4 Plow Clockwise
2008-2012-Chevy-Malibu-Headlight-Bulbs-Replacement-Guide-060
Sidemarker Bulb Socket
Insert a new H11 depression axle bulb straight into the headlight assembly and rotate it 1/4 turn clockwise to lock it into place. 2008-2012-Chevy-Malibu-Headlight-Bulbs-Replacement-Guide-061
1/iv Turn Counter Clockwise
2008-2012-Chevy-Malibu-Headlight-Bulbs-Replacement-Guide-062
Pull Out Side Marking Bulb
2008-2012-Chevy-Malibu-Headlight-Bulbs-Replacement-Guide-063
# 168 Bulb
The Side Marker light bulb is located at the outer edge of the headlight associates.

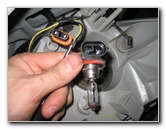
Rotate the side marking light socket i/iv plow counter clockwise and pull information technology directly out of the headlight.

Pull the side marker seedling straight out of the socket and push in a new # 168 bulb.

If yous would like to take brighter side mark lights, install some uniform replacement 168 LED bulbs.

Insert the seedling and socket dorsum into the headlight and rotate it 1/4 plough clockwise to secure it in identify.

2008-2012-Chevy-Malibu-Headlight-Bulbs-Replacement-Guide-064
one/4 Plow Clockwise
2008-2012-Chevy-Malibu-Headlight-Bulbs-Replacement-Guide-065
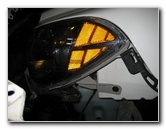
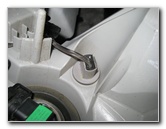
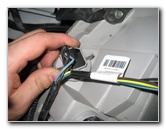
Plough Signal Seedling Socket
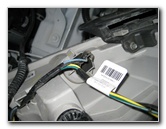
2008-2012-Chevy-Malibu-Headlight-Bulbs-Replacement-Guide-066
Pull Off Wire Loom
The turn point lite bulb socket is located at the inner border of the headlight assembly.

Gently pull the wire loom away from the rear of the headlight to make some slack. Then rotate the turn signal bulb'due south socket 1/iv turn counter clockwise and pull it straight out of the headlight.

2008-2012-Chevy-Malibu-Headlight-Bulbs-Replacement-Guide-067
1/iv Turn Counter Clockwise
2008-2012-Chevy-Malibu-Headlight-Bulbs-Replacement-Guide-068
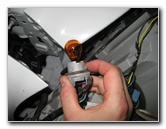
Pull Out Sometime Turn Signal Bulb
2008-2012-Chevy-Malibu-Headlight-Bulbs-Replacement-Guide-069
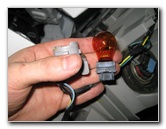
# 4157NA Turn Signal Bulb
Pull the old turn signal lite bulb straight out of the socket.

Push in a new # 4157NA (or 5702NAK) amber colored light bulb straight into the socket.

Insert the plough bespeak socket back into the headlight and rotate it 1/four turn clockwise to secure it in place.

2008-2012-Chevy-Malibu-Headlight-Bulbs-Replacement-Guide-070
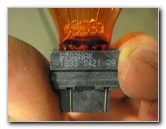
Alternate Seedling # 5702NAK
2008-2012-Chevy-Malibu-Headlight-Bulbs-Replacement-Guide-071
Re-adhere Wire Loom
2008-2012-Chevy-Malibu-Headlight-Bulbs-Replacement-Guide-072
Line Up Plastic Spikes
Re-attach the wire loom to the rear of the headlight housing.

It would be a skillful idea to test the new light bulb(s) now before re-assembling the bumper.

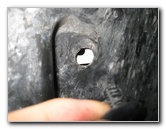
Turn the headlight back over and line upwardly the plastic spikes on the rear with the holes in the automobile'south metallic trunk work.

2008-2012-Chevy-Malibu-Headlight-Bulbs-Replacement-Guide-073
Insert Peg Into Hole
2008-2012-Chevy-Malibu-Headlight-Bulbs-Replacement-Guide-074
Headlight Associates Replaced
2008-2012-Chevy-Malibu-Headlight-Bulbs-Replacement-Guide-075
Tighten 10mm Side Bolt
Push button the headlight back into place until the plastic spikes are fully seated.

Insert the black 10mm bolt on the side of the headlight and tighten it with the socket and ratcheting wrench.

2008-2012-Chevy-Malibu-Headlight-Bulbs-Replacement-Guide-076
Insert Black Front end Commodities
2008-2012-Chevy-Malibu-Headlight-Bulbs-Replacement-Guide-077
Re-Attach Black Bracket
2008-2012-Chevy-Malibu-Headlight-Bulbs-Replacement-Guide-078
Black Bracket In Place
Insert the 2nd black 10mm bolt into the front end of the headlight housing and tighten information technology.

Re-adhere the black plastic subclass in identify over the peak border of the headlight. Insert and tighten the two silver 10mm bolts.

2008-2012-Chevy-Malibu-Headlight-Bulbs-Replacement-Guide-079
Insert 2 Silver 10mm Bolts
2008-2012-Chevy-Malibu-Headlight-Bulbs-Replacement-Guide-080
Line Up Front Bumper
2008-2012-Chevy-Malibu-Headlight-Bulbs-Replacement-Guide-081
Lower Bumper Over Bracket
Line up the front of the bumper and gently push it towards the vehicle.

Lower the top part of the bumper over the black plastic bracket until the bumper is flush with the quarter panel.

2008-2012-Chevy-Malibu-Headlight-Bulbs-Replacement-Guide-082
Top Of Bumper In Place
2008-2012-Chevy-Malibu-Headlight-Bulbs-Replacement-Guide-083
Insert Bumper Side Over Bracket
2008-2012-Chevy-Malibu-Headlight-Bulbs-Replacement-Guide-084
Side of Bumper Installed
Next insert the side of the bumper over the black plastic subclass by the bike well. 2008-2012-Chevy-Malibu-Headlight-Bulbs-Replacement-Guide-085
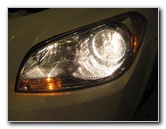
Examination New Headlight Bulbs
2008-2012-Chevy-Malibu-Headlight-Bulbs-Replacement-Guide-086
Line Up Bumper & Bracket
2008-2012-Chevy-Malibu-Headlight-Bulbs-Replacement-Guide-087
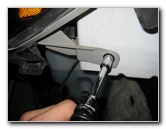
Insert Closer 10mm Bolt
If you haven't already, test the new headlight seedling(s) before continuing the re-associates process.

Pull bated the bicycle well liner and insert the 10mm bolt back into the closest hole. Tighten the closest 10mm bolt and also the other one located a few inches frontwards of the wheel well.

2008-2012-Chevy-Malibu-Headlight-Bulbs-Replacement-Guide-088
Farther 10mm Bolt
2008-2012-Chevy-Malibu-Headlight-Bulbs-Replacement-Guide-089
Tighten Both 10mm Bolts
2008-2012-Chevy-Malibu-Headlight-Bulbs-Replacement-Guide-090
Wheel Well Liner
Line upward the black plastic cycle well liner with the holes in the bumper cover and re-insert the Xmas tree fasteners. 2008-2012-Chevy-Malibu-Headlight-Bulbs-Replacement-Guide-091
Insert Plastic Pop Rivets
2008-2012-Chevy-Malibu-Headlight-Bulbs-Replacement-Guide-092
Line Up Liner & Hole
2008-2012-Chevy-Malibu-Headlight-Bulbs-Replacement-Guide-093
Bottom Of Bumper
Button all iv black plastic pop rivets firmly into the cycle well until they are affluent with the liner. 2008-2012-Chevy-Malibu-Headlight-Bulbs-Replacement-Guide-094
Insert Xmas Tree Fastener
2008-2012-Chevy-Malibu-Headlight-Bulbs-Replacement-Guide-095
Insert 7mm Screws
2008-2012-Chevy-Malibu-Headlight-Bulbs-Replacement-Guide-096
Tighten 7mm Screws
Move to the underbody cover located beneath the bumper and insert the 7mm screws. Tighten the 7mm screws and re-insert the black plastic popular rivet fastener. 2008-2012-Chevy-Malibu-Headlight-Bulbs-Replacement-Guide-097
Replace Plastic Radiator Cover
2008-2012-Chevy-Malibu-Headlight-Bulbs-Replacement-Guide-098
Replace 11 Bolts & 4 Rivets
2008-2012-Chevy-Malibu-Headlight-Bulbs-Replacement-Guide-099
two Large Bolts - Front Eye
Place the black plastic radiator cover back over the meridian of the engine bay.

Supervene upon the 9 standard 10mm bolts, the two large head 10mm bolts (front center almost hood latch), and the 4 black pop rivets (front edge).

2008-2012-Chevy-Malibu-Headlight-Bulbs-Replacement-Guide-100
10mm Bolt By Latch
2008-2012-Chevy-Malibu-Headlight-Bulbs-Replacement-Guide-101
four Pop Rivets - Front end Corners
2008-2012-Chevy-Malibu-Headlight-Bulbs-Replacement-Guide-102
Insert Center of Rivet
To re-install the black plastic pop rivets, first insert the larger outer piece then push button in the smaller piece into the heart. 2008-2012-Chevy-Malibu-Headlight-Bulbs-Replacement-Guide-103
Tighten 11 10mm Bolts
2008-2012-Chevy-Malibu-Headlight-Bulbs-Replacement-Guide-104
Re-Assembly Complete
2008-2012-Chevy-Malibu-Headlight-Bulbs-Replacement-Guide-105
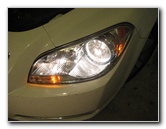
Test Depression, High Beam, Signal
Tighten all 11 of the 10mm bolts and close the hood of the car to complete the chore.

Be sure to record the bulb change in your vehicle'due south service records.

Please cheque out my other 2008-2012 Chevy Malibu Repair & Maintenance Guides.

Source: https://paulstravelpictures.com/2008-2012-GM-Chevrolet-Malibu-Headlight-Bulbs-Replacement-Guide/

Posted by: majorreeld1968.blogspot.com

0 Response to "How To Change Low Beam Headlight On 2011 Chevy Malibu"

Post a Comment

Iklan Atas Artikel

Iklan Tengah Artikel 1

Iklan Tengah Artikel 2

Iklan Bawah Artikel